Python PyQt5 image annotation application
Write a Python program that displays an image and allows users to annotate it with text.
From doc.qt.io:
QApplication Class: The QApplication class manages the GUI application's control flow and main settings.
QMainWindow Class: The QMainWindow class provides a main application window.
QGraphicsView Class: The QGraphicsView class provides a widget for displaying the contents of a QGraphicsScene.
QGraphicsScene Class: The QGraphicsScene class provides a surface for managing a large number of 2D graphical items.
QGraphicsTextItem Class: The QGraphicsTextItem class provides a text item that you can add to a QGraphicsScene to display formatted text.
QInputDialog Class: The QInputDialog class provides a simple convenience dialog to get a single value from the user.
QPixmap Class: The QPixmap class is an off-screen image representation that can be used as a paint device.
QFont Class: The QFont class specifies a query for a font used for drawing text.
Qt module: PyQt5 is a set of Python bindings for the Qt application framework. It allows us to use Qt, a popular C++ framework, to create graphical user interfaces (GUIs) in Python.
Sample Solution:
Python Code:
import sys
from PyQt5.QtWidgets import QApplication, QMainWindow, QGraphicsView, QGraphicsScene, QGraphicsTextItem, QInputDialog
from PyQt5.QtGui import QPixmap, QFont
from PyQt5.QtCore import Qt
class ImageViewerApp(QMainWindow):
def __init__(self):
super().__init__()
self.setWindowTitle("Image Viewer with Annotations")
self.setGeometry(100, 100, 500, 400)
self.initUI()
def initUI(self):
self.scene = QGraphicsScene()
self.view = QGraphicsView(self.scene)
self.view.setSceneRect(0, 0, 500, 400)
self.setCentralWidget(self.view)
self.image = QPixmap("image1.png") # Load your image here
self.scene.addPixmap(self.image)
self.annotation_mode = False
self.view.mousePressEvent = self.mousePressEventCustom
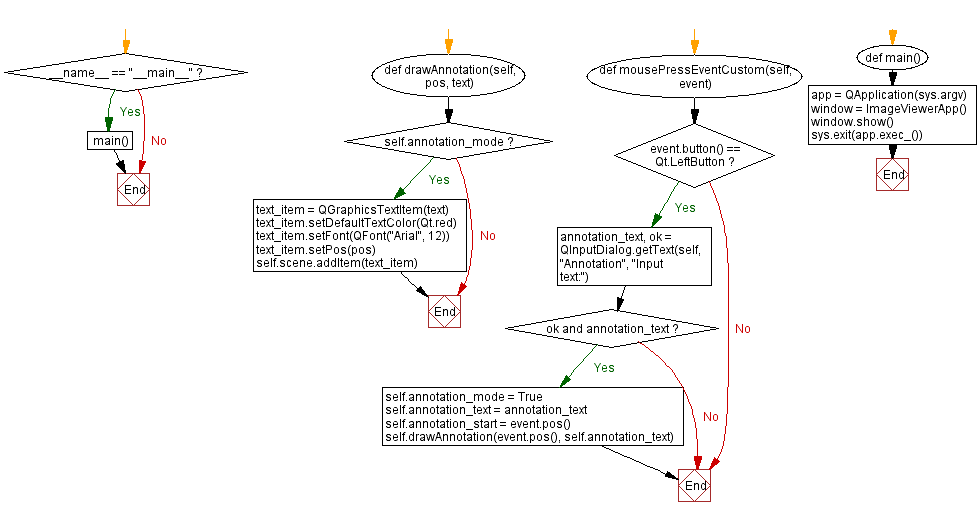
def drawAnnotation(self, pos, text):
if self.annotation_mode:
text_item = QGraphicsTextItem(text)
text_item.setDefaultTextColor(Qt.red)
text_item.setFont(QFont("Arial", 12))
text_item.setPos(pos)
self.scene.addItem(text_item)
def mousePressEventCustom(self, event):
if event.button() == Qt.LeftButton:
annotation_text, ok = QInputDialog.getText(self, "Annotation", "Input text:")
if ok and annotation_text:
self.annotation_mode = True
self.annotation_text = annotation_text
self.annotation_start = event.pos()
self.drawAnnotation(event.pos(), self.annotation_text)
def main():
app = QApplication(sys.argv)
window = ImageViewerApp()
window.show()
sys.exit(app.exec_())
if __name__ == "__main__":
main()
Explanation:
In the exercise above -
Import the necessary modules from PyQt5 for creating the application.
We create a custom ImageViewerApp class that inherits from QMainWindow, which is the main application window.
In the initUI method, we set up the main user interface:
- We create a QGraphicsView widget to display the image.
- We load an image using QPixmap and add it to a QGraphicsScene.
- We handle mouse events (clicks) by overriding the mousePressEvent method.
We define a drawAnnotation method that takes a position and text as input and adds a red text annotation to the scene.
In the mousePressEventCustom method, when the user clicks the left mouse button:
- We prompt the user for text input using QInputDialog.
- If text is entered, we set annotation_mode to True, store the annotation text and the starting position.
- We call drawAnnotation to display the annotation on the image.
The main function sets up the application and runs it.
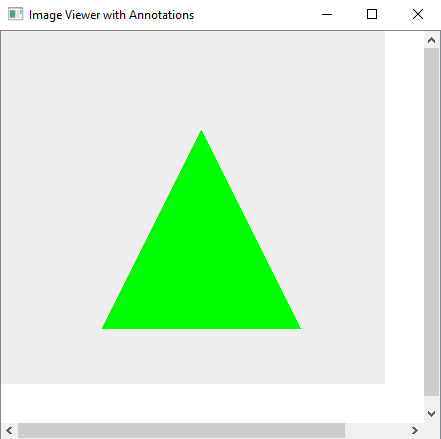
Output:

Flowchart:

Go to:
Previous: Python PyQt5 drawing application.
Next: Python PyQt5 digital clock widget.
Python Code Editor:
What is the difficulty level of this exercise?
Test your Programming skills with w3resource's quiz.