Organize widgets with Python Tkinter's grid manager
Write a Python program that arranges widgets using the Grid geometry manager with rows and columns.
Sample Solution:
Python Code:
import tkinter as tk
# Create the main Tkinter window
parent = tk.Tk()
parent.title("Widgets with Grid")
# Create label widgets
label1 = tk.Label(parent, text="Label 1", padx=10, pady=5, bg="lightblue")
label2 = tk.Label(parent, text="Label 2", padx=10, pady=5, bg="lightgreen")
label3 = tk.Label(parent, text="Label 3", padx=10, pady=5, bg="lightyellow")
# Create a button
button = tk.Button(parent, text="Click Me", padx=10, pady=5, bg="orange", command=parent.quit)
# Use the Grid geometry manager to arrange widgets
label1.grid(row=0, column=0)
label2.grid(row=0, column=1)
label3.grid(row=1, column=0, columnspan=2)
button.grid(row=2, column=0, columnspan=2)
# Run the Tkinter main loop
parent.mainloop()
Explanation:
In the exercise above -
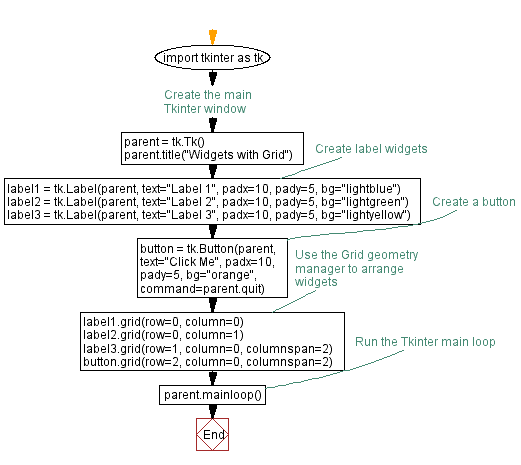
- import the tkinter module as tk.
- Create the main Tkinter window using tk.Tk() and set its title to "Widgets with Grid."
- Create three label widgets (label1, label2, and label3) and a button widget (button), each with specific text, padding, and background colors.
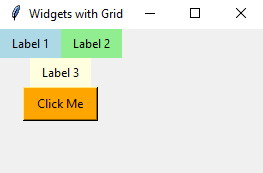
- Next we use the grid() method to arrange widgets in a grid layout. We specify the row and column positions for each widget. "columnspan" is used to make 'label3' span across two columns.
- Finally, we start the Tkinter main loop with root.mainloop() to display the widgets arranged with Grid geometry manager.
Sample Output:
Flowchart:

Go to:
Previous: Create a vertical label layout in Python Tkinter.
Next: Create a Python login form with Tkinter's grid manager.
Python Code Editor:
What is the difficulty level of this exercise?
Test your Programming skills with w3resource's quiz.

