Create a chat application interface with Python Tkinter
Write a Python program that designs a chat application interface with message history and an input field. Organize these elements using the Grid geometry manager.
Sample Solution:
Python Code:
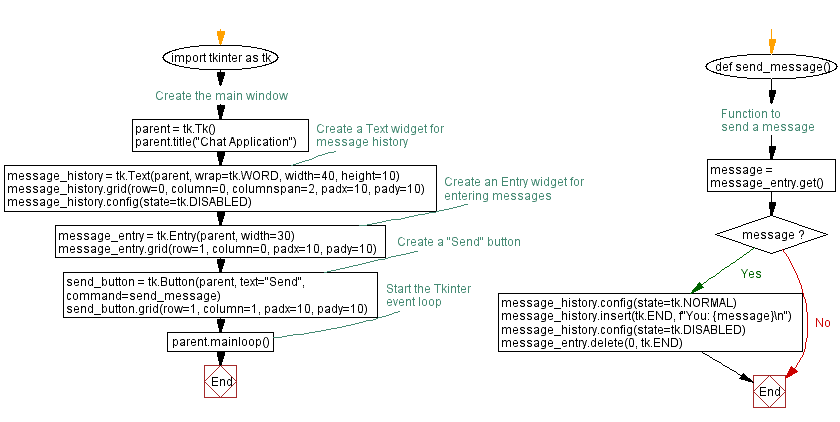
import tkinter as tk

# Function to send a message
def send_message():
    message = message_entry.get()
    if message:
        message_history.config(state=tk.NORMAL)
        message_history.insert(tk.END, f"You: {message}\n")
        message_history.config(state=tk.DISABLED)
        message_entry.delete(0, tk.END)

# Create the main window
parent = tk.Tk()
parent.title("Chat Application")

# Create a Text widget for message history
message_history = tk.Text(parent, wrap=tk.WORD, width=40, height=10)
message_history.grid(row=0, column=0, columnspan=2, padx=10, pady=10)
message_history.config(state=tk.DISABLED)

# Create an Entry widget for entering messages
message_entry = tk.Entry(parent, width=30)
message_entry.grid(row=1, column=0, padx=10, pady=10)

# Create a "Send" button
send_button = tk.Button(parent, text="Send", command=send_message)
send_button.grid(row=1, column=1, padx=10, pady=10)

# Start the Tkinter event loop
parent.mainloop()
Explanation:
In the exercise above -
- First we create the main window using tk.Tk() and set its title to "Chat Application."
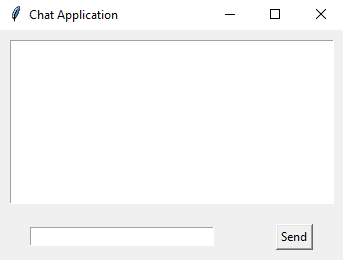
- To display the message history, a Text widget is created (message_history). It is configured to wrap words, have a width of 40 characters, and a height of 10 lines. To prevent user input, the state is initially set to tk.DISABLED. It spans across two columns and is placed in the grid at row 0.
- Messages are entered using an Entry widget (message_entry). It has a width of 30 characters and is placed in the grid at row 1.
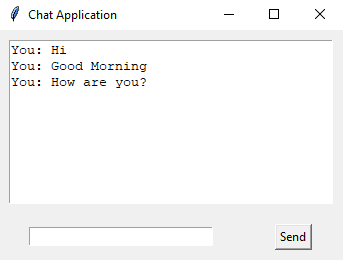
- The "Send" button is created and associated with the send_message function, which sends the message entered in the Entry widget to the message history Text widget. The button is placed in the grid at row 1.
- The Tkinter Grid geometry manager is used to organize the widgets within rows and columns in the main window.
- The program starts the Tkinter event loop with root.mainloop(), allowing the GUI to run and respond to user interactions.
Sample Output:
Flowchart:

Go to:
Previous: Create an employee list application with Python Tkinter.
Next: Create a basic calendar application with Python Tkinter.
Python Code Editor:
What is the difficulty level of this exercise?
Test your Programming skills with w3resource's quiz.


